toilet paper roll pillow box

I started making the rest of my surprise snowballs this afternoon, but didn’t have any more small boxes for the center gift. In its place I made some pillow boxes out of empty toilet paper rolls.

They’re so easy – just bend down one side of the roll.

Bend the other side and squeeze the edge of the fold to get a nice crescent-shaped crease.

Insert treats inside, wrap a ribbon round, tie a bow, and adhere the quote! Check out more fun ideas for recycling toilet paper tubes.


Posted in things to make | 3 Comments

Twinkle does good


In case you haven’t heard of Elf on the Shelf before, this is a fun tradition to do with your littles. Some people bring out their elf the day after Thanksgiving or the first day of December. Others choose to shelf their elves until the last week or two before Christmas. When the elf makes its appearance, it supposedly keeps its eye on the kids and reports back to Santa who’s been naughty or nice. The elf shows up in a new place every morning, and some are less prone to mayhem than others.

Since our Twinkle showed up on a Saturday, she was a very good elf and prepared for the Sabbath by opening up a personal progress book and her scriptures. She couldn’t resist the pretty scripture ribbons, though, and did play a little.


Posted in Christmas, elf on the shelf | 1 Comment

DIY Elf on the Shelf

There is a new elf in the house! I have been quite smitten by all the Elf on the Shelf photos floating around the internet. I could not bring myself to drop 30 bucks on buying the little guy, though. I kept flirting with that buy button, but ultimately decided I could make an elf that would work just fine, which I did, for less than a dollar.

Here is Twinkle, our sweet elf, feeling chummy and a bit sentimental towards her old body. This little doll was the base for a crochet project that I found at Salvation Army for 99 cents. I simply popped off her head, and sewed a very basic body for her with supplies I had already on hand. The “unique” decorative trim on her hat is covering some cuts in the felt. I wanted to finish her late last night, so pieced together some tiny scraps to get her complete.

I made a few upgrades that the original Elf on the Shelf doesn’t have like polka-dot mitten hands, vintage skirt with ric rac trim, and bendy wire arms and legs. She is a little top-heavy, so needs to lean on something to sit well, but other than that she is great. She suits our all-girl team pretty well, too.

I don’t have much of a tutorial to share, since I whipped her together, not knowing what I was doing half the time. Her head is attached to the hat and felt collar with hot glue, and although I added a wooden skewer inside her torso and head to secure, I’m not sure that was necessary.

My girls are smitten with Twinkle, and we are all looking forward to her future escapades. You can follow along here.

I’ve linked up this DIY elf post here:

Posted in Christmas, elf on the shelf | 5 Comments

Bookbinding is easier than it looks

I wanted to bind a few notebooks today, and they came together so nicely I thought I’d share the process. You’ll need copy paper, cardstock, an embroidery needle, embroidery floss and a hole punch. I began by folding five sheets of 8.5 x 11″ copy paper and one piece of cardstock in half.

You then punch a hole in the center of the fold. Punch holes again, around 2″ apart, on either side of the center hole.

Place the folded copy paper inside the cardstock cover, and stick the needle through the holes of the copypaper, so it pierces through the cardstock as well.

Thread  the needle by folding a tiny piece of paper over the end of the embroidery floss, and sliding through the eye.

Starting from the outside of the cover, pull the needle and thread through, leaving a few inches outside – enough to tie a knot when finished with the binding.

Go back down through one of the holes to the side of the center.

Take your needle through again starting from the back. (by the way, that little stub sticking out is not quite long enough to tie a knot!)

One more time take the needle through the center hole.

Then tie the knot to finish the book. You could leave the strings longer and add beads or some other decorative element, but I wanted mine to be fairly simple.

This is how the inside of your newly hand-bound book will look!

I finished my book with a picture of the Savior and some references to the lesson (YW manual 3 lesson 2) we are teaching on Sunday. I’m using several ideas from the brilliant Angela Williams. Thank you Angela!


Posted in things to make | Tagged | Comments Off on Bookbinding is easier than it looks

Symbols of Christmas Ornaments

We are making felt ornaments with the young women tonight to share with some ward members as a Christmas gift. We will be also sewing little muslin drawstring bags to keep them in. These ornaments all relate to the symbols of Christmas in the “Teach the Children” legend, which is as following:

Late one Christmas Eve, I sank back, tired but content, into my easy chair. The kids were in bed, the gifts were wrapped, the milk and cookies waited by the fireplace for Santa. As I sat back admiring the tree with its decorations, I couldn’t help feeling that something important was missing. It wasn’t long before the tiny twinkling tree lights lulled me to sleep.

I don’t know how long I slept, but all of a sudden I knew that I wasn’t alone. I opened my eyes, and you can imagine my surprise when I saw Santa Claus himself standing next to my Christmas tree. He was dressed all in fur from his head to his foot just as the poem described him, but he was not the “jolly old elf” of Christmas legend. The man who stood before me looked sad and disappointed, and there were tears in his eyes.

“Santa, what’s wrong?” I asked, “Why are you crying?”

“It’s the children,” Santa replied sadly.

“But Santa, the children love you,” I said.

“Oh, I know they love me, and they love the gifts I bring them,” Santa said, “but the children of today seem to have somehow missed out on the true spirit of Christmas. It’s not their fault. It’s just that the adults, many of them not having been taught themselves, have forgotten to teach the children.”

“Teach them what?” I asked.

Santa’s kind old face became soft, more gentle. His eyes began to shine with something more than tears. He spoke softly. “Teach the children the true meaning of Christmas. Teach them that the part of Christmas we can see, hear, and touch is much more than meets the eye. Teach them the symbolism behind the customs and traditions of Christmas which we now observe. Teach them what it is they truly represent.”

Santa reached into his bag and pulled out a tiny Christmas tree and set it on my mantle. “Teach them about the Christmas tree. Green is the second color of Christmas. The stately evergreen, with its unchanging color, represents the hope of eternal life in Jesus. Its needles point heavenward as a reminder that mankind’s thoughts should turn heavenward as well.”

Santa reached into his bag again and pulled out a shiny star and placed it at the top of the small tree. “The star was the heavenly sign of promise. God promised a Savior for the world and the star was the sign of the fulfillment of that promise on the night that Jesus Christ was born. Teach the children that God always fulfills His promises, and that wise men still seek Him.”

“Red,” said Santa, “is the first color of Christmas.” He pulled forth a red ornament for the tiny tree. “Red is deep, intense, vivid. It is the color of the life-giving blood that flows through our veins. It is the symbol of God’s greatest gift. Teach the children that Christ gave His life and shed His blood for them that they might have eternal life. When they see the color red, it should remind them of that most wonderful Gift.”

Santa found a silver bell in his pack and placed it on the tree. “Just as lost sheep are guided to safety by the sound of the bell, it continues to ring today for all to be guided to the fold. Teach the children to follow the true Shepherd, who gave His life for the sheep.”

Santa placed a candle on the mantle and lit it. The soft glow from its one tiny flame brightened the room. “The glow of the candle represents how people can show their thanks for the gift of God’s Son that Christmas Eve long ago. Teach the children to follow in Christ’s foot steps… to go about doing good. Teach them to let their light so shine before people that all may see it and glorify God. This is what is symbolized when the twinkling lights shine on the tree like hundreds of bright, shining candles, each of them representing one of God’s precious children, their light shining for all to see.”

Again Santa reached into his bag and this time he brought forth a tiny red and white striped cane. As he hung it on the tree he spoke softly. “The candy cane is a stick of hard white candy: white to symbolize the virgin birth and sinless nature of Jesus, and hard to symbolize the Solid Rock the foundation of the church, and the firmness of God’s promises. The candy cane is in the form of a ‘J’ to represent the precious name of Jesus, who came to earth. It also represents the Good Shepherd’s crook, which He uses to reach down into the ditches of the world to lift out the fallen lambs who, like all sheep, have gone astray. The original candy cane had three small red stripes, which are the stripes of the scourging Jesus received by which we are healed, and a large red stripe that represents the shed blood of Jesus, so that we can have the promise of eternal life.”

“Teach these things to the children.”

Santa brought out a beautiful wreath made of fresh, fragrant greenery tied with a bright red bow. “The bow reminds us of the bond of perfection, which is love. The wreath embodies all the good things about Christmas for those with eyes to see and hearts to understand. It contains the colors of red and green and the heaven-turned needles of the evergreen. The bow tells the story of good will towards all and its color reminds us of Christ’s sacrifice. Even its very shape is symbolic, representing eternity and the eternal nature of Christ’s love. It is a circle, without beginning and without end. These are the things you must teach the children.”

I asked, “But where does that leave you, Santa?”

The tears gone now from his eyes, a smile broke over Santa’s face. “Why bless you, my dear,” he laughed, “I’m only a symbol myself. I represent the spirit of family fun and the joy of giving and receiving. If the children are taught these other things, there is no danger that I’ll ever be forgotten.”

“I think I’m beginning to understand.”

“That’s why I came,” said Santa. “You’re an adult. If you don’t teach the children these things, then who will?”

(Author Unknown)

Many of my ornaments were based off of patterns in this “Fa la la la Felt” book. I adapted them so we could do less sewing and more gluing – but her original designs make me giddy due to their extreme cuteness. Highly recommend!


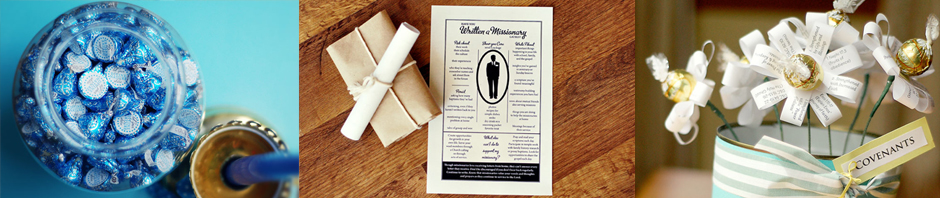
If you’d like, you can download my pdf version of “Teach the Children”.

You can also find free downloads from a few projects from Fa la la la Felt on Stumbles and Stitches. You have to do some clicking around to find them, but they are still available!


Posted in Christmas | 3 Comments

Ornament Exchange

Yesterday I attended a fabulous ornament exchange in the home of a friend. There were 12 women in attendance, each of whom had been invited months in advance, with specific instructions on how to prepare for the exchange.

The guidelines were as following:

1. After agreeing to participate in the exchange, you must make every effort to attend – eleven other ladies are counting on you to be there!

2. Bring identical 12 ornaments – 11 to share and one to keep

3. The ornaments should be made by you

4. Come prepared to share why you made the ornament you did

4. Bring a salad or dessert for a luncheon

It was so enjoyable to meet new friends, learn the stories behind the ornaments, and come home with a dozen genuine treasures. I wanted to share with you, in the same order that they were presented, the ornaments of our exchange.

This window ornament was made by the hostess of our exchange. She lived in New England at one time, and fell in love with the tradition of hanging wreaths in her front windows at Christmas time. She had four large windows in her previous home, and always adorned them with lovely wreaths. It was fun to glance at the windows of her home where we sat, and see beautiful wreaths hanging there.

Our next ornament was shared by a friend from Finland. While visiting Scandinavian islands last summer, she found these heart ornaments that were actually made by a cousin of hers. Because hearts are a common Finnish decorative element, she wanted to share these at our exchange.

This sweet little Hershey Kiss mouse was presented by a dear friend who claims she hasn’t a crafty bone in her body. They turned out so sweet, though, and were gladly received by all. She also, as a “condolence prize” shared a favorite Christmas recipe. 🙂

Our next ornament was made by a self-professed “rock nut”. She loves collecting rocks, and makes jewelry and sculpture with them. All the tiny rocks comprising this birdhouse are from Lake Superior. The pinecone roof and grapevine wreath were made from sources in her back yard. This is a bona fide Michigan treasure, and was so amazing to receive.

This star was created by a friend who first made various wire ornaments while serving as the Faith in God leader for our girls. So fun to make, and each star was beautifully unique.

These trees were made by a woman who had previously made a lot of stained glass windows. She has a glass grinder and a relative with a kiln, where she could “slump” the beads. The copper wire is my favorite part – I love the thick twists and turns she formed.

This ornament was made by cutting “The Living Christ” into strips, rolling, and placing inside a glass ball. It is fun to see bits and pieces of this precious document while turning the ball.

This ornament is so fun – a melted snowman, including stick arms, button eyes, coal mouth, carrot nose, top hat and plaid scarf. Finding miniature carrots and getting the hat to fit inside the small ball opening was a comedy of errors, but the finished ornament is darling.

This beautiful spider ornament was shared along with the Legend of the Christmas Spider. I love how this spider looks and feels in the hand, and the message is sweet as well.

These cinnamon applesauce stars were shared by a friend, who explained how special they were to her as a child. She thought her mother was magical, the way she made these ornaments out of a few cupboard ingredients. They smell wonderful.

This little angel was made by a friend who was inspired by her angel-loving daughter. As a toddler, this little girl would take the angels from the tree and hide them under her pillow. The angel was often missing from the nativity, and could be found being loved and played with by this daughter. They look forward to seeing the angels every Christmas, and I love being reminded of this sweet girl with her mother’s ornament.

I was last to share my shores of Galilee ornament. I found some ring boxes that the ornaments just barely fit in, and printed the verse about being “like the man who walked the shores of Galilee” on sticker paper, which I placed on the lid of the box. This way the tiny ornament was protected, and the verse wouldn’t be misplaced.

I am already looking forward to next year’s exchange. It will be incredible to hear more of these ladies’ stories and to to bring home another dozen ornament treasures.


Posted in Christmas | 20 Comments

Guardians of Virtue

We had a wonderful Young Women in Excellence last night, and I thought I’d share a few details from the evening. Inspired by this evening, we sang Guardians of Virtue as a musical number, had a beautiful slide show of the girls using pictures from the year’s activities, and made shields for each young woman.

We actually had the girls make their own shields, decorating them with magazine cutouts and paint markers, describing a personal progress experience or project that they worked on this year. We had them line up (at one point in the program) holding their shields, and one at a time, completing this phrase: “I am a guardian of virtue because…” It was awesome to hear what they are doing – in one short sentence – to be an example of goodness to others.

We also had these framed photos on the display tables. They turned out beautiful – inspired from here. They were a happy take-home gift for the girls.

Our refreshments table was inspired from a doughnut-themed party, which we changed up a little for our theme.

In preparation for the evening, we talked about putting on the armor of God, and related each piece to personal progress and the things Sister Dalton talked about in her Guardians of Virtue talk. This was another idea from the Sisters in Zion blog, that I adapted by replacing the man with a young woman.

You can download the pdf here.


Posted in youth | 1 Comment

Visiting Teaching Surprise Snowball

 The December 2011 Visiting Teaching message talks again about an “extensive sphere of action” – how as we serve in our homes and communities, we have great influence on those around us. To illustrate this sphere, I made a “Surprise Snowball” with elements of the message (in treat form) wrapped inside layers of crepe paper.

These are all the things I tucked inside the snowball: a pencil for marking scriptures (although I would recommend a much shorter pencil to fit in the snowball better!), some yeast symbolizing how we can magnify (or increase) our service in callings, a globe ornament ball signifying our influence in the world, pretzels as folded arms in prayer, sunflower seeds as faith, gift chocolates as the gifts and talents we have to share with others, and a candy bar to make the foundation of a “home”.

Here they are with all their tags attached.

I started out by putting the gift chocolates in a small box along with the discussion question. On the lid I taped a quote from the message. (You could also make a toilet paper roll pillow box if you don’t have boxes on hand)

Then I started wrapping and wrapping the box with crepe paper, and adding each surprise after every few layers. (You can get the instructions for the globe ornament here. I used an old atlas for my paper strips.)

At the end of the snowball (are you loving the pencil sticking out of it? ;), I taped this tag to the top layers. I then wrapped the whole thing in some cellophane and tied it up with ribbon and the snowball tag.

I thought it would be fun to give a gift and the Visiting Teaching message all in one sweet package. Hope you enjoy this, and have a wonderful holiday season!

You can download the Surprise Snowball tags below:

English

Portuguese

French

Dutch

Spanish (You can also download the snowball instructions in Spanish.)

Thank you so much to my translators: Birgitta, Blanche, Christine, Ana Carolina and Delmy!

Posted in relief society | 18 Comments

What kind of Ancestor will I be?

To go along with the YW lesson on Heritage, I wanted a journaling prompt, similar to what the Red Headed Hostess did. I will have several questions, and the girls can select one or two to answer:

What do I want my family to remember about me?

What legacies do I want to leave behind?

What do I want my children and grandchildren to know about me?

What traditions will help shape my future family towards righteous living?

What can I do now to prepare to become a goodly parent with a heritage of righteous traditions to pass on to my children?

As an added element of FUN, I have photos of all the girls, and have run them through the iphone app, Oldbooth. The photos above are of yours truly, but you get the idea. I’ve put a photostrip together of our whole class, and put it at the top of the journaling prompt handout. I think they will love seeing themselves and their friends as actual “ancestors”, and I hope it will get them thinking about how future generations will look back and remember the legacies that they have the opportunity to leave behind.


Posted in families, youth | 3 Comments

Christ’s Coming Advent Calendar

I have another great advent calendar to share with you today. This Sunday I am teaching the Young Women from Manual 3 lesson 19: Heritage. The lesson begins by sharing some favorite family traditions. There are so many wonderful traditions to make around the holidays – and one of them is counting down to Christmas.

I have used different scriptural advent calendars throughout the years – as a family and in my personal study. This is one I found in the New Era Magazine, from 2008. There is a scripture for each day about the birth and life of the Savior, and activities to help us be more like Christ. I wanted to make it a special gift for my girls, so cut and paste the advent into these beautiful cards I found on Cathe Holden’s blog.

There is one card for each day. After reading the scripture and completing the activity on the top card, place it in the back of the stack, and read the subsequent card the next day. I tri-folded a piece pf 8-1/2 x 11″ kraft cardstock and sewed up 2 sides to make an easy, yet sturdy envelope.

I then closed it up with a couple brads and a piece of string.

All you do us tie a knot behind one of the brads before inserting into the hole. Then wrap the string around both brads to secure the flap down. These star brads are cute, but I actually found the standard round brass brads are a little easier to wrap around – and sometimes simple is best!

You can download the pdf for the advent:

in English here.

in Spanish here.

Posted in Christmas | 13 Comments